Connecting to MQTT
Vehicle events can be streamed directly to an MQTT broker, allowing the vehicle state to be dynamically updated, with readings of interest able to be individually monitored and updates subscribed to.
Setting up an MQTT Broker
Note
While it is recommended to run a local broker, if you do not have a local broker available and are unable to set one up, there are a number of public brokers available for testing, such as test.mosquitto.org.
The simplest way to set up a local broker is to run the broker in a self-contained Docker container. The open source Eclipse Mosquitto broker comes ready to run for a wide range of architectures.
Running the broker is a simple matter of:
docker run -p 1883:1883 eclipse-mosquitto
which will run with the default configuration and expose the broker
port 1883 to the host network.
Publishing to an MQTT Broker
Once you have a broker available, the settings can be entered into
the simulator. First make sure that the MQTT Support checkbox is
selected, then enter the broker address and the topic name:
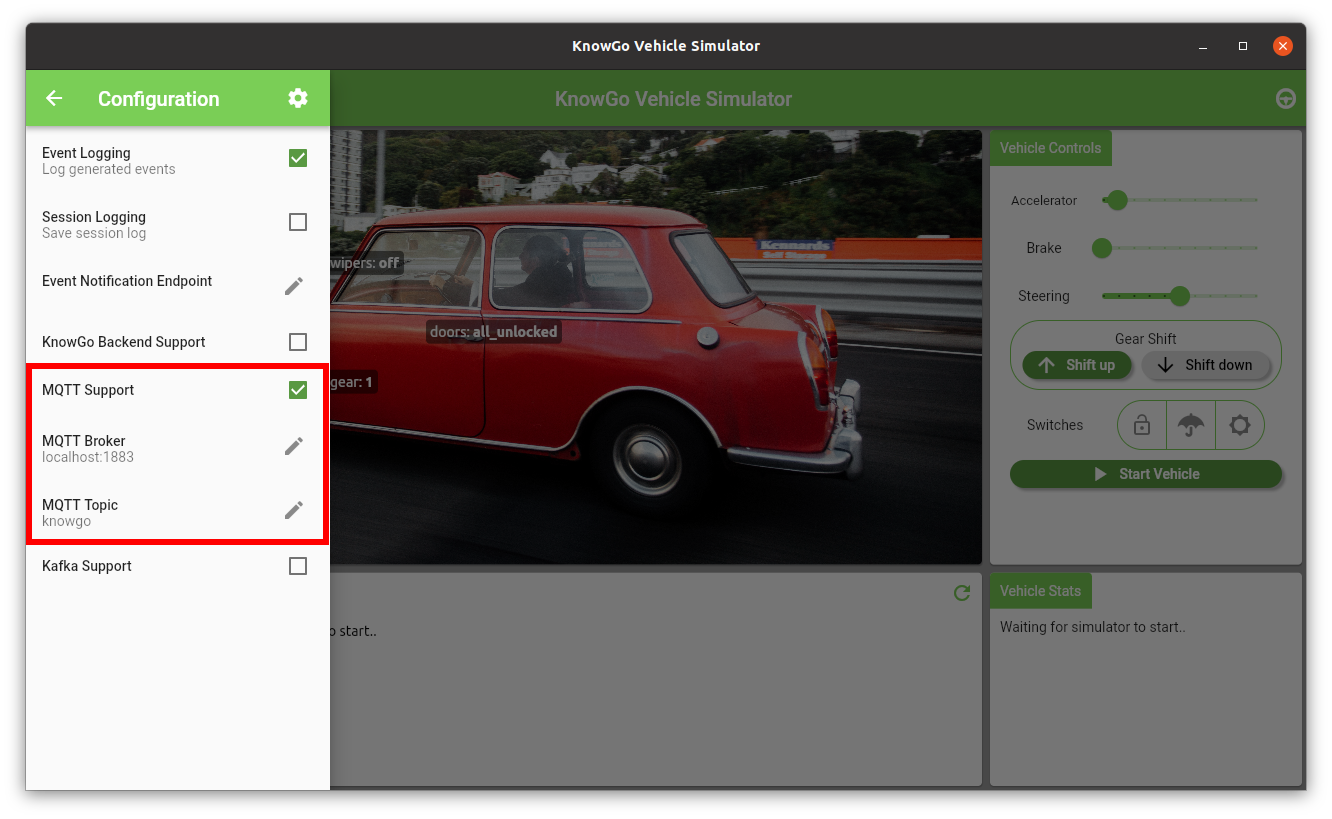
After starting the vehicle, event telemetry should begin flowing into the broker.
Subscribing to an MQTT Topic
To subscribe or monitor messsages coming into the broker for a given topic, you will need an MQTT client. If you prefer to use the command line, the official Eclipse Mosquitto client/server can be installed from here. If you prefer a graphical interface, MQTT Explorer is a good option.
If using the Mosquitto client, topics can be subscribed to as:
mosquitto_sub -t <topic>
If using MQTT Explorer, topic subscriptions are managed under the
Advanced button under the broker settings.
Sub-Topics & Subscriptions Per-Reading
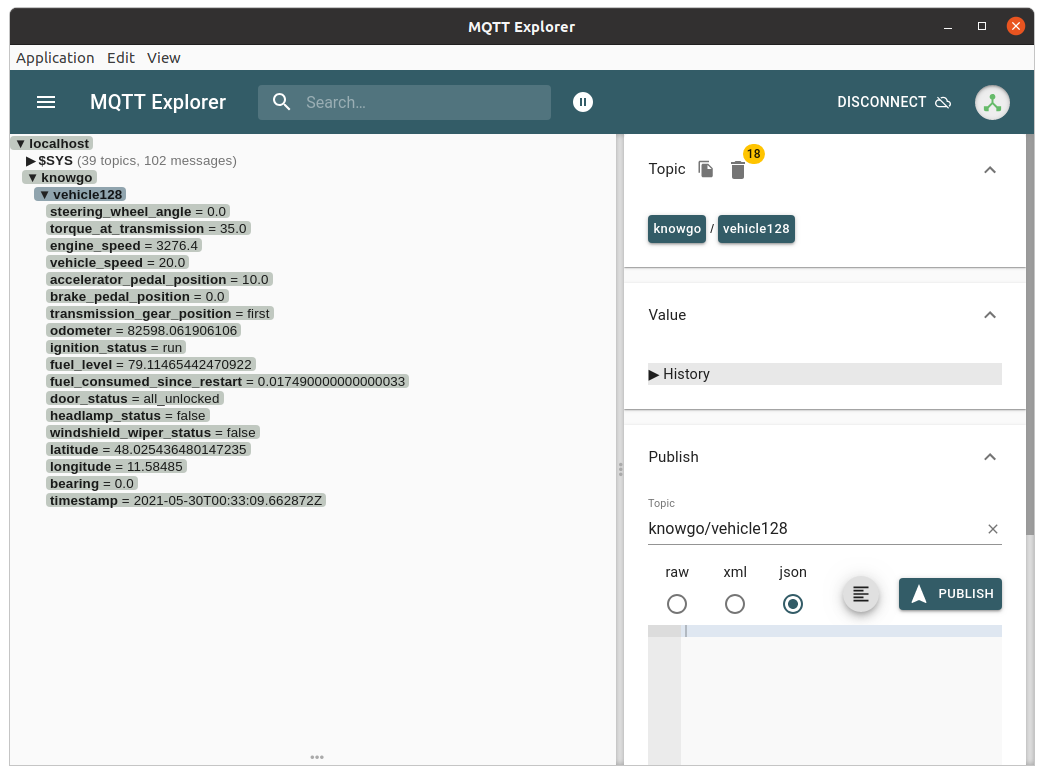
The following individually subscribable sub-topics are created by default:
<topic> / vehicle<vehicleID> / steering_wheel_angle
<topic> / vehicle<vehicleID> / torque_at_transmission
<topic> / vehicle<vehicleID> / engine_speed
<topic> / vehicle<vehicleID> / vehicle_speed
<topic> / vehicle<vehicleID> / accelerator_pedal_position
<topic> / vehicle<vehicleID> / brake_pedal_position
<topic> / vehicle<vehicleID> / transmission_gear_position
<topic> / vehicle<vehicleID> / odometer
<topic> / vehicle<vehicleID> / ignition_status
<topic> / vehicle<vehicleID> / fuel_level
<topic> / vehicle<vehicleID> / fuel_consumed_since_restart
<topic> / vehicle<vehicleID> / door_status
<topic> / vehicle<vehicleID> / headlamp_status
<topic> / vehicle<vehicleID> / windshield_wiper_status
<topic> / vehicle<vehicleID> / latitude
<topic> / vehicle<vehicleID> / longitude
<topic> / vehicle<vehicleID> / bearing
<topic> / vehicle<vehicleID> / timestamp
This can be seen in the default MQTT Explorer view when connecting to the broker:
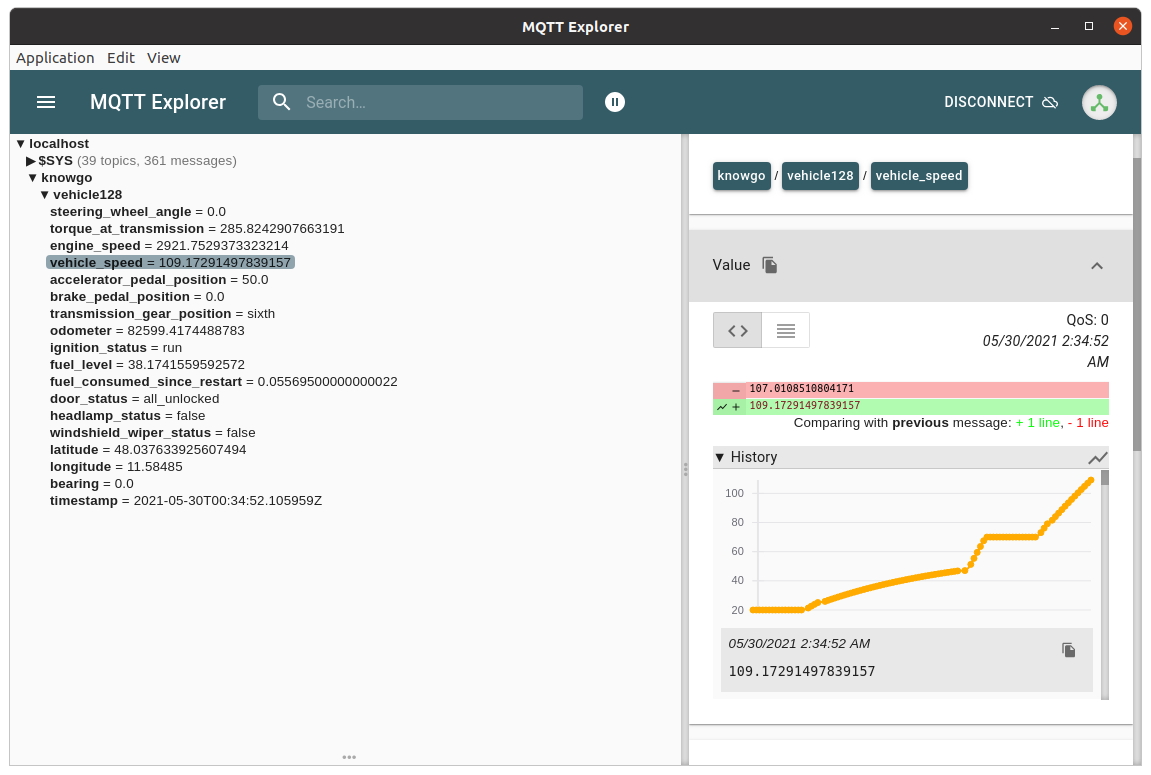
each sub-topic can then be examined and plotted individually:
Topic Wildcards
For the default case of there only being a single vehicle connected to
the broker, the + wildcard may be used for matching the vehicle:
<topic> / + / <reading>
This can be useful in the case where the vehicle ID has not been pre-configured in the configuration settings and is dynamically created by the simulator.
To obtain all readings for a given vehicle, the # wildcard may be
used for the subscription:
<topic> / + / #
For the fleet case where multiple simulators are generating events for multiple vehicles, you will need to specify the ID of the vehicle you are interested in explicitly.