REST API Tutorial
The KnowGo Vehicle Simulator REST API can be interacted with in a number of different ways:
- Through Postman with the provided collections and environments.
- Directly from the OpenAPI specification
These are elaborated in more detail in the sections below.
Note
As parts of the REST API require API responses to be captured and used as inputs in other requests, we recommend using the provided Postman configuration where this process has been automated for you.
By default, each of these methods of interaction expect to communicate with an instance of the simulator running on your local machine; each method has, therefore, been pre-configured with a local environment in mind.
Postman Tutorial

Step 1: Downloading and Installing Postman
Having a valid Postman environment is a prerequisite for continuing on with the remaining steps. Postman can either be downloaded and installed locally, or used in the browser. Please proceed to the Postman download page to complete this step.
Step 2: Downloading the KnowGo Postman Collection
We have developed a comprehensive Postman Collection that includes requests, sample payloads/return values, and validation for all of the defined APIs exposed by the simulator. A pre-configured environment for interacting with the simulator running locally on your machine has also been provided. These can be obtained directly from our GitHub page:
Both the collection and environment are continuously synchronized with any changes made to the REST API. As the REST API is still under active development, please ensure you are always using the latest version in order to avoid API conflicts or other types of undefined behaviour.
Note
The simulator does not expose different versions of the REST API and will always serve the latest version.
Step 3: Importing the Collection and Configuring the Environment
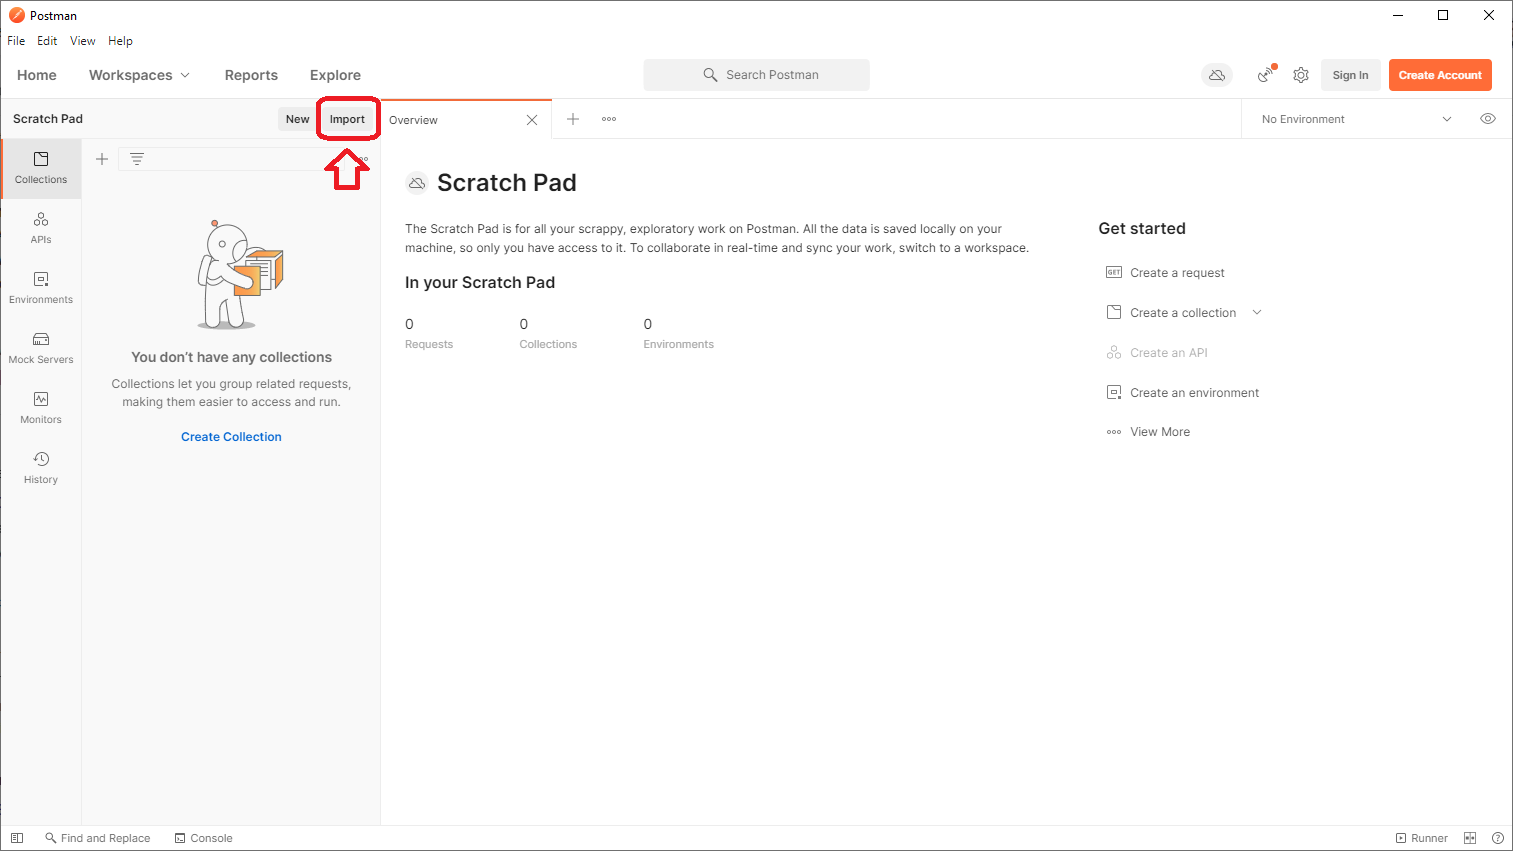
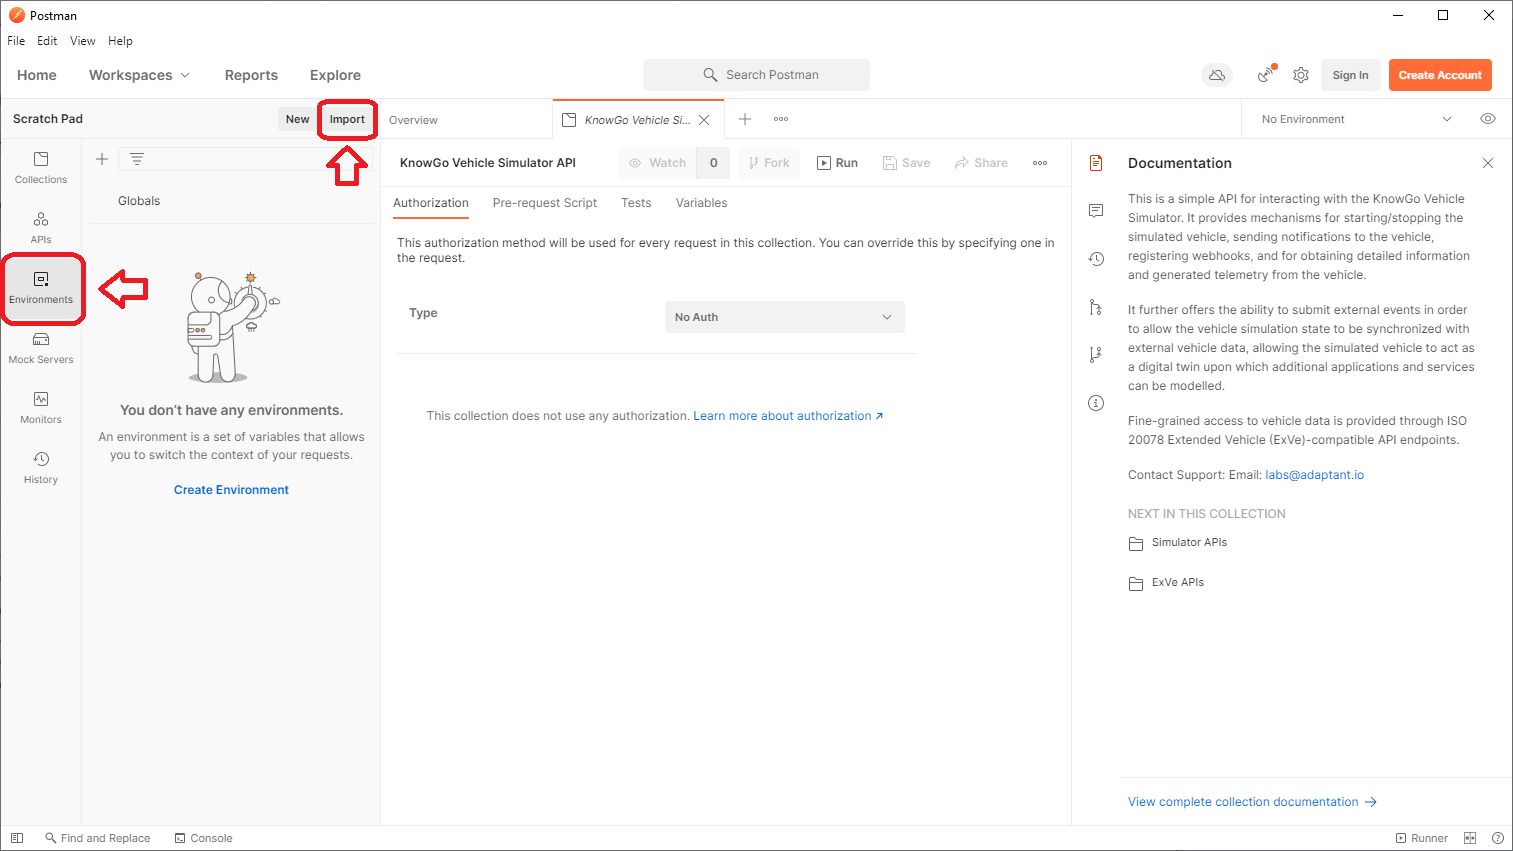
When launching Postman for the first time, you will be greeted with the Scratch Pad workspace, in which all changes are kept only on your local machine. From here, the collection can be imported by navigating to the import button:
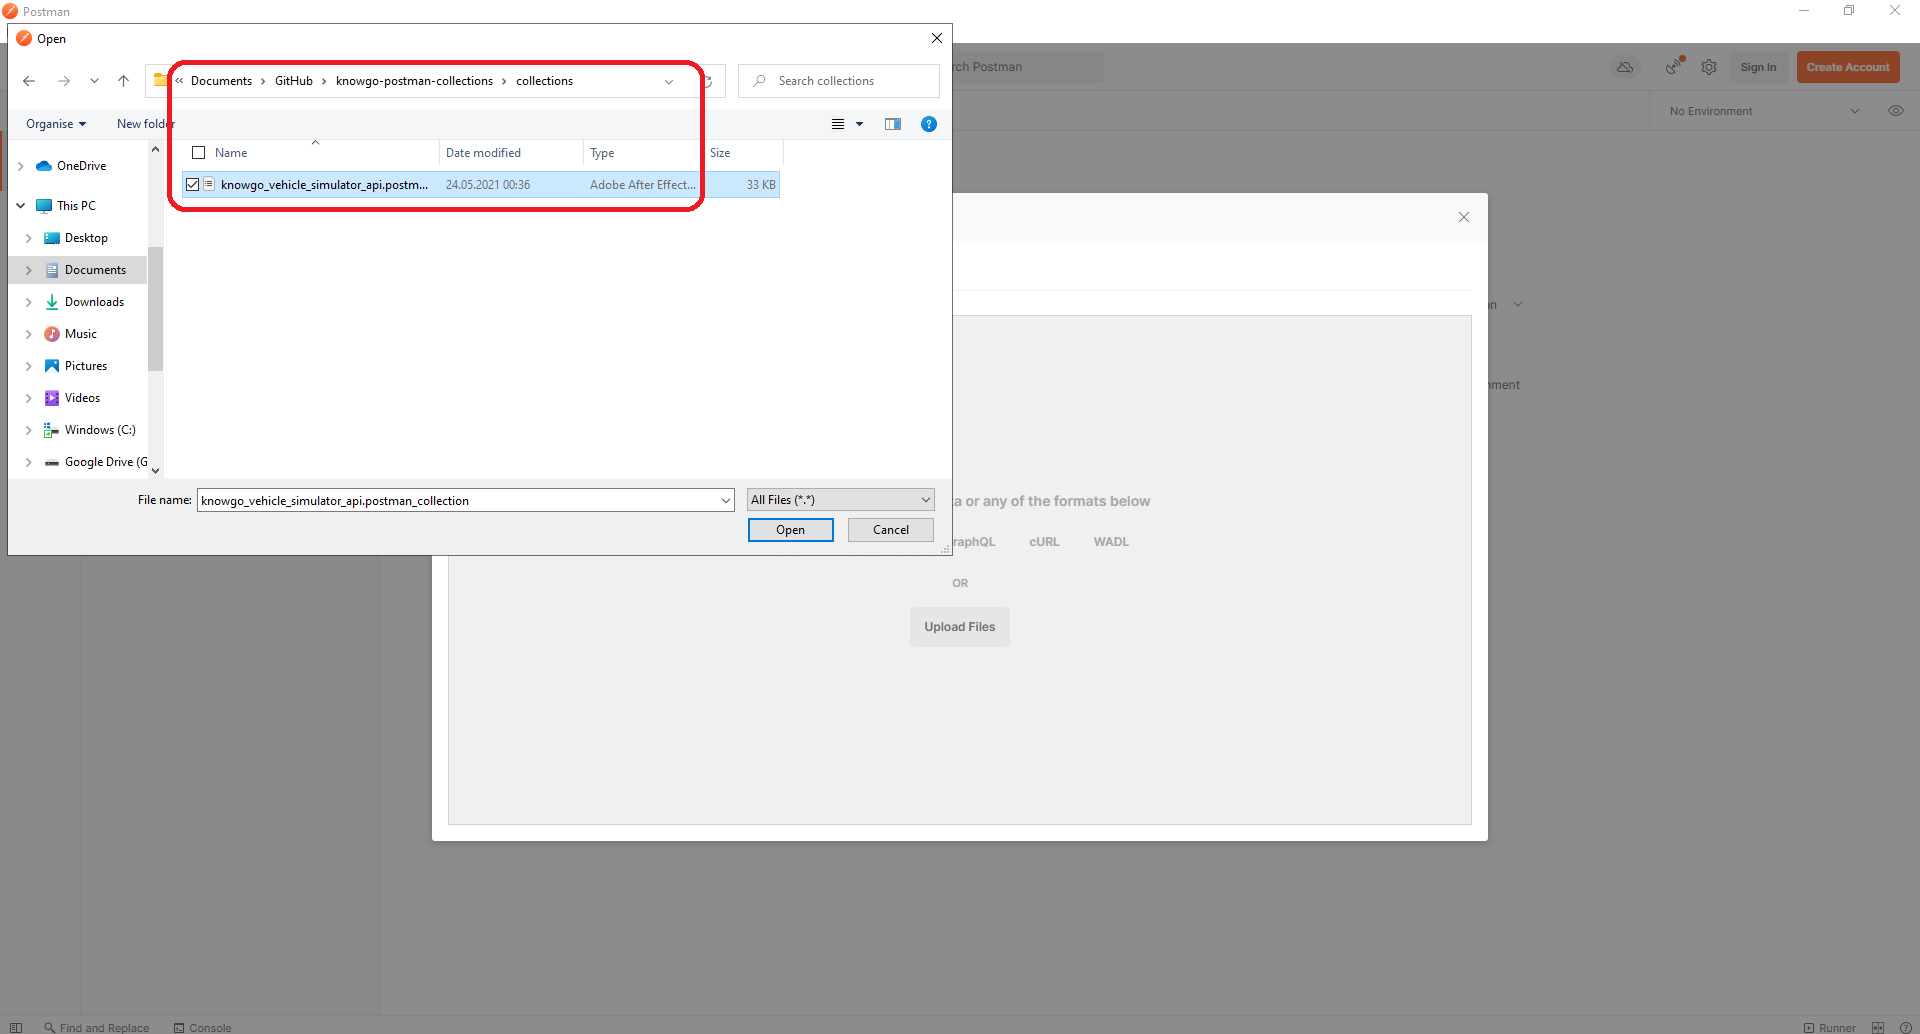
From here, navigate to wherever you have cloned or otherwise downloaded
the collection and select the
knowgo_vehicle_simulator_api.postman_collection.json file:
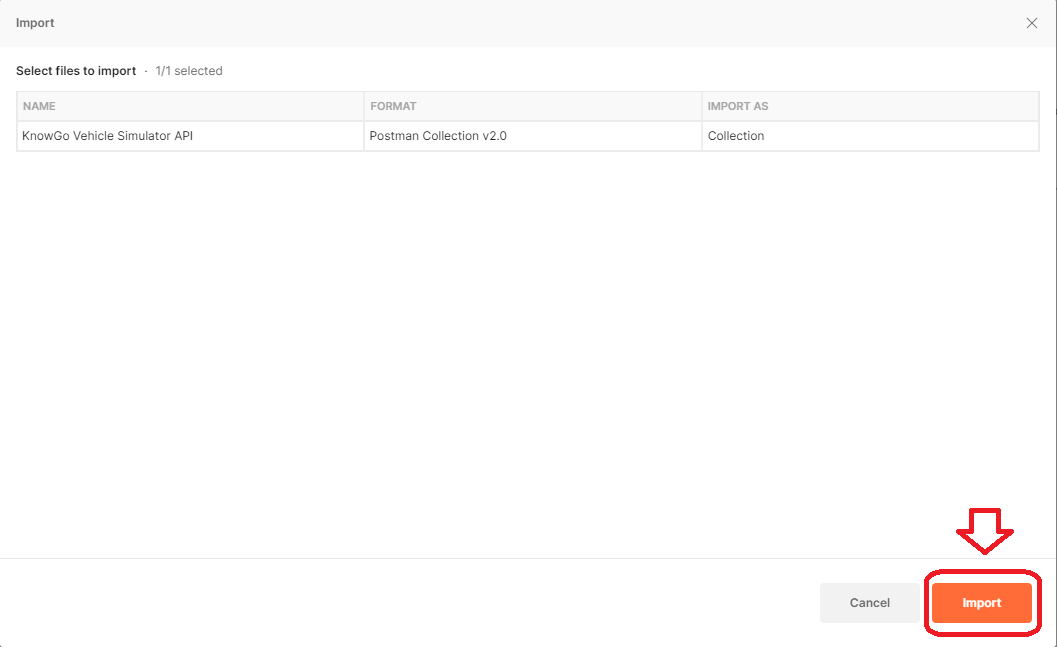
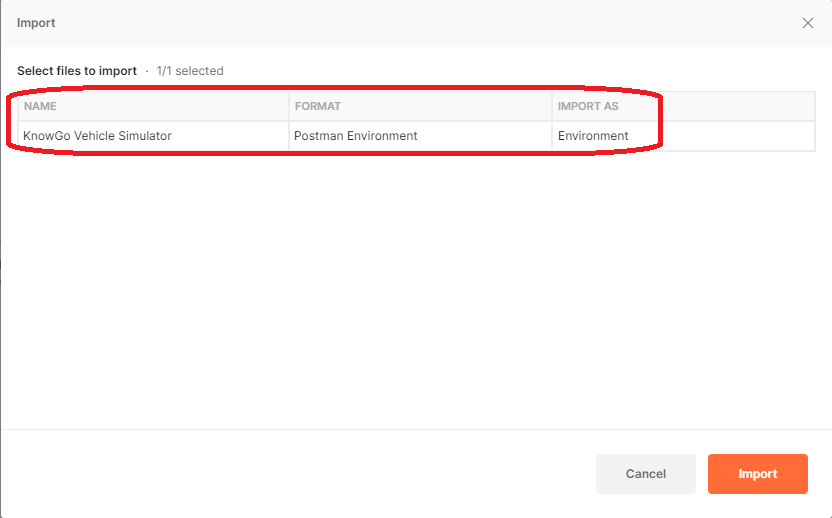
After this, you should see the name of the collection and that Postman has recognized it as a valid Collection for import. Click on the import button to proceed:
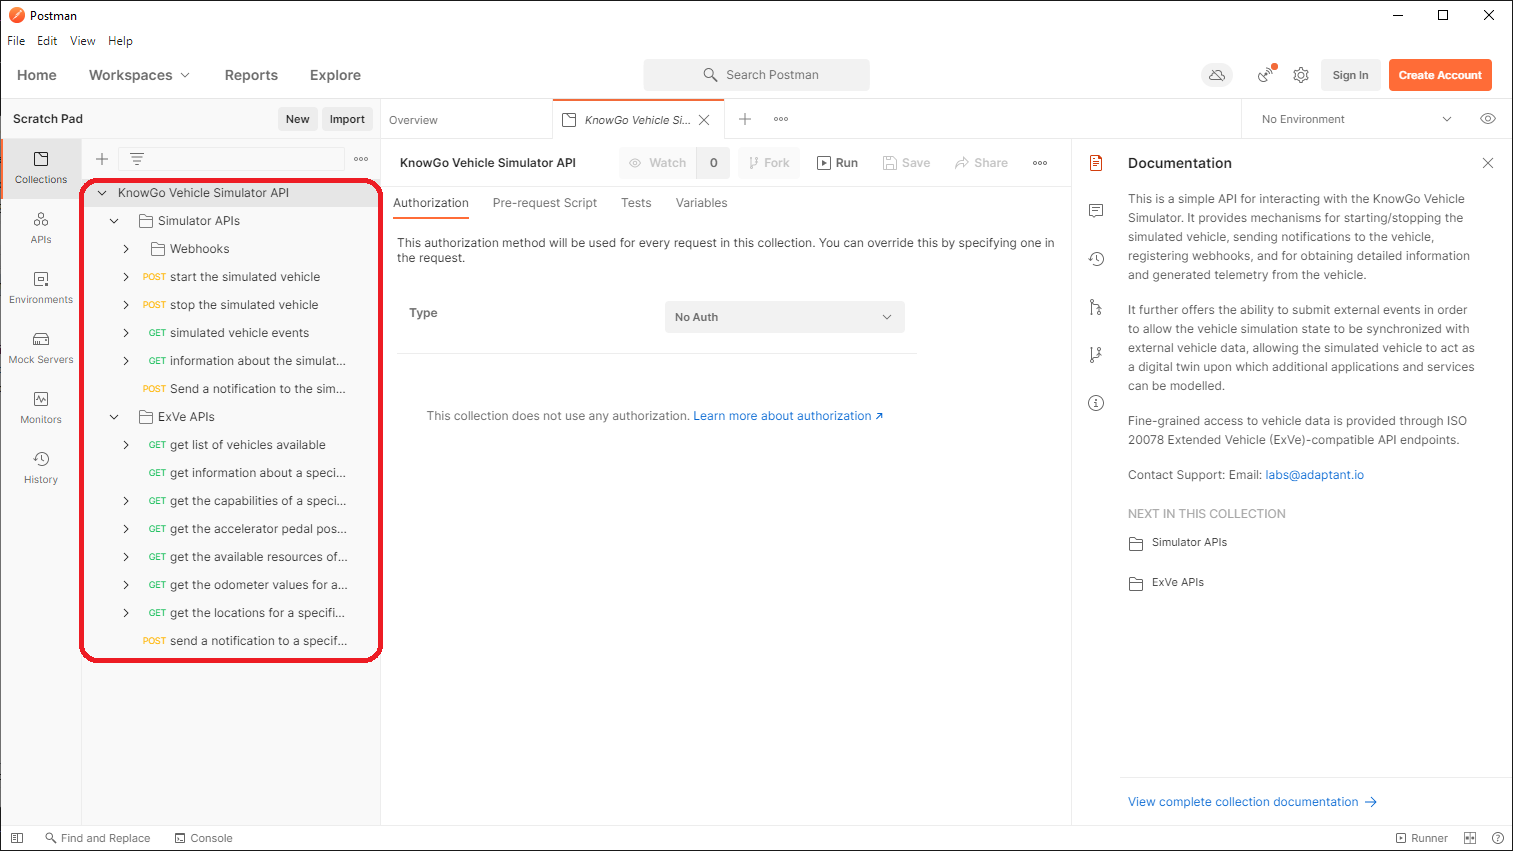
You should now see the KnowGo Vehicle Simulator API in your list of
collections:
After this step, the collection has been successfully imported, but no
environment has yet been assigned. The environment definition can now be
imported. First, select Environments from the panel on the left, then
proceed with the import as before, this time selecting the corresponding
knowgo_vehicle_simulator_api.postman_environment.json file:
At this point, the environment definition should be recognized as a valid Environment definition:
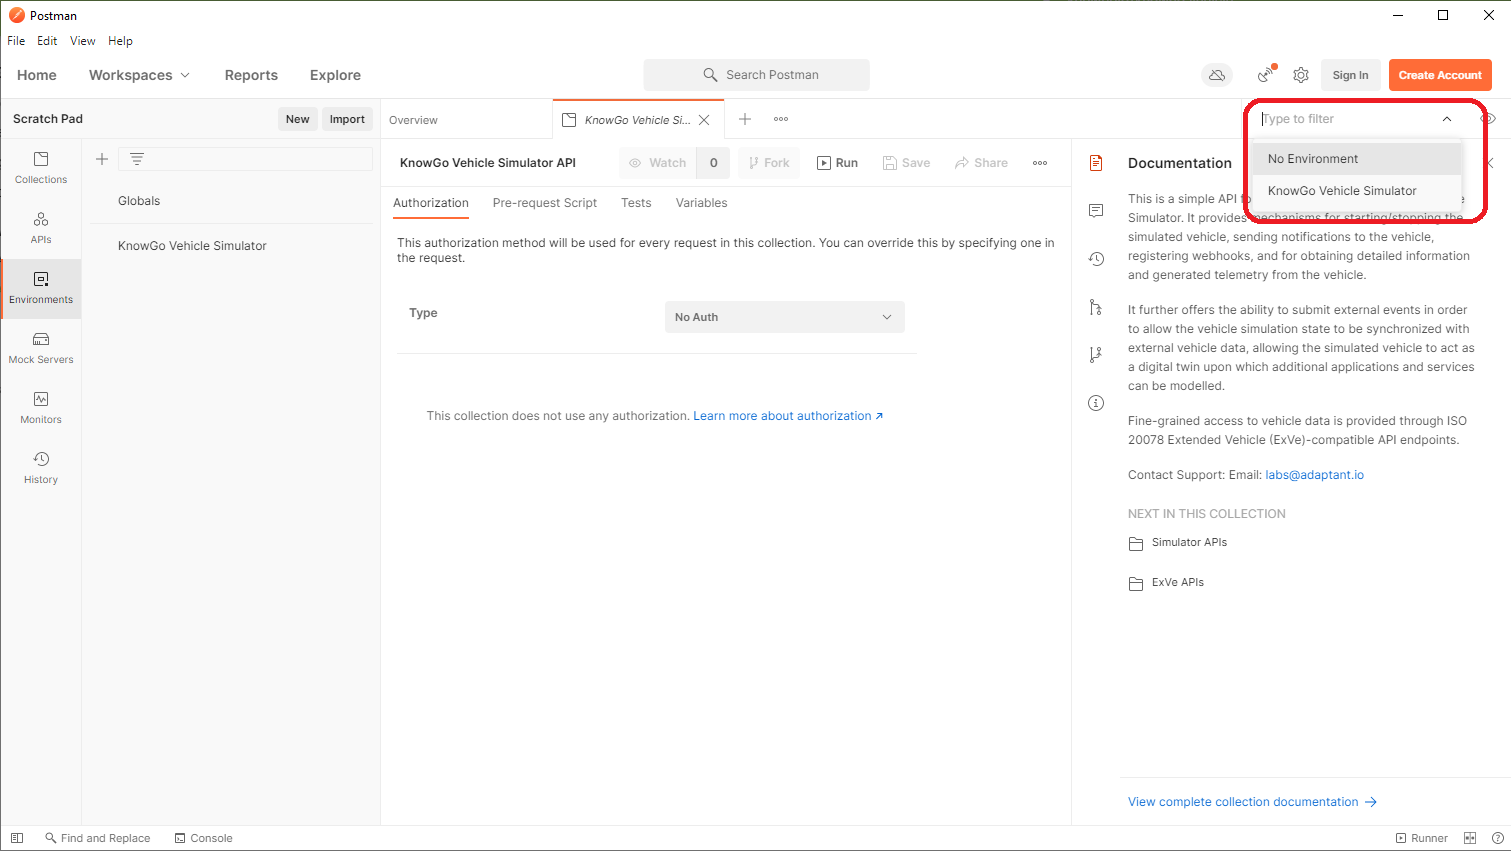
The final step is to now set the KnowGo Vehicle Simulator environment
as the active environment. This is accomplished by selecting it from the
environment drop-down menu on the top right:
You are now ready to start issuing REST API requests to the simulator.
Step 4: Making REST API Requests to the Simulator
Many of the API requests require IDs that are either statically configured or dynamically generated by the Simulator. Postman automatically sets these values in your environment for you when queries are issued in-order, allowing you to forego the need for any copying and pasting of identifiers.
Before we can begin issuing queries for specific vehicle data, however, we first need to obtain the vehicle ID. The vehicle ID is populated when the Simulator is launched, and will have been either assigned through the configuration file or dynamically generated by the Simulator. Note that the vehicle does not need to be running in order for this information to be obtained, it is sufficient just to have the Simulator app open.
Step 5: Configuring Webhooks
The Simulator allows for a number of different webhooks to be registered, utilizing any combination of event triggers and notification endpoints. The available webhooks are described in more detail on the webhooks page:
By default, the Simulator provides support for all available event triggers. In a production setting, these are more likely to be constrained both by resource availability and driver consent, so applications should similarly endeavour to constrain their scope to the bare minimum required.
The most straightforward way to visualize receipt of webhook notifications is by setting up a simple echo server.
OpenAPI Tutorial
Please refer directly to the REST API specification.